Markbook allows staff to mark learner assessments by selecting the necessary assessment and learners, then entering the marks. Staff need the Markbook user or eMarkbook user and the Mark assessments role for Ontrack Staff Hub. Tutors can also access Markbook if they are assigned to a course or unit.

This takes you to the Markbook screen.
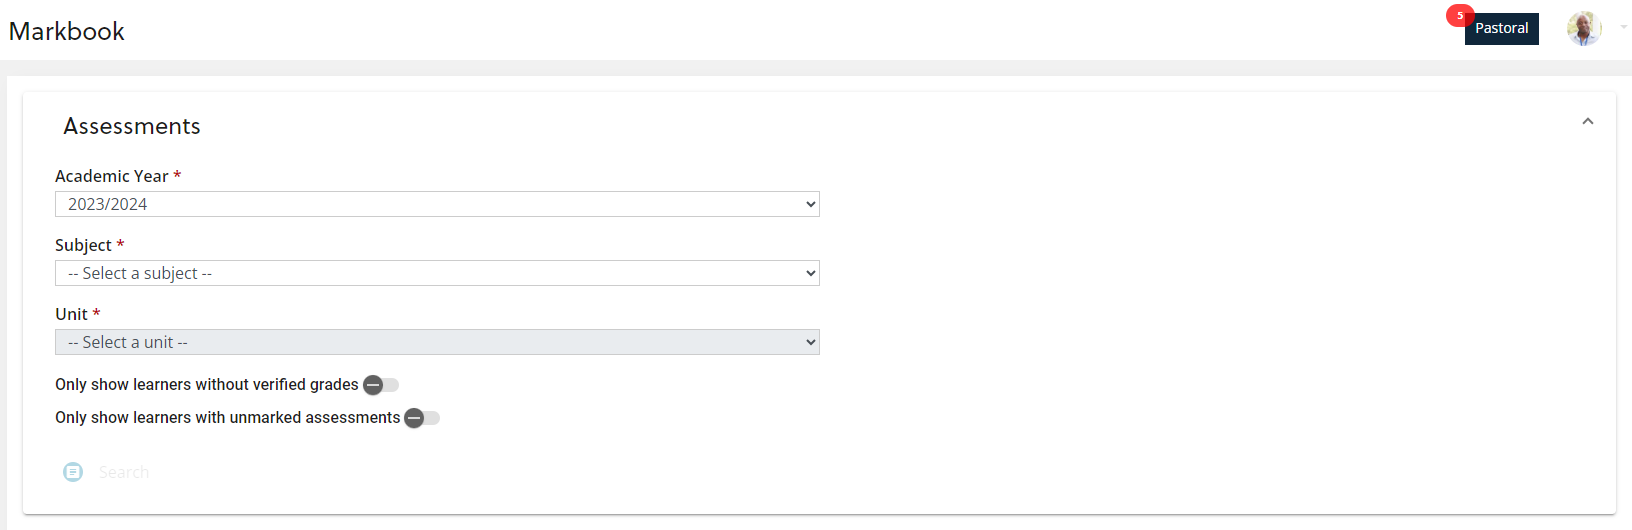
Select an assessment and learners
Using the drop-down options and toggles you can search for assessment you need. The filtering options are:
-
Academic Year (Required) - Select the appropriate academic year from the drop-down box. The current year is selected by default.
-
Subject (Required) - Select the subject you need to see assessments for. You can only select subjects you are a tutor for.
-
Unit (Required) - Once you have selected a subject you need to select the unit from the drop down list.
-
Tutor group - You can further filter the results shown on the markbook by tutor group - this can be based on programme, unit, or subject.
-
Only show learners without verified grades - When this toggle is turned on the markbook will only include learners who do not yet have final verified grade. If learners with verified grades are included you will be unable to edit their marks.
-
Only show learners with unmarked assessments - When this toggle is turned on the markbook will only include learners who have assessments that are missing marks.
NZ You can view LNAAT assessment grades within Markbook. However, the LNAAT assessment grades are read-only and not editable.
Once you have entered all the details you need select Search
This opens a markbook with learners that match your choices. The search fields are hidden to give more space for the markbook. If you want to change your search you can re-open the search box by selecting the Assessments expand.
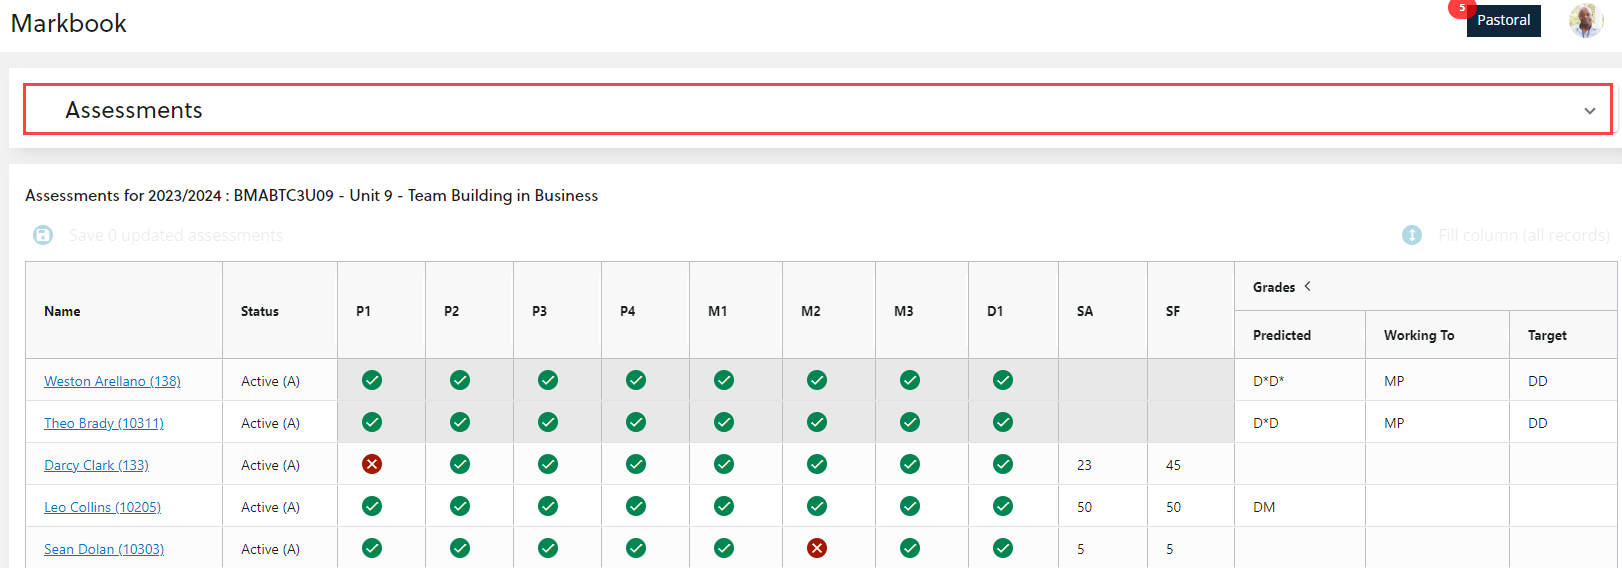
Enter marks
To enter marks for a learner select the cell for the assessment. How you enter the mark depends on how the assessment has been set up:
If a number is required, select the field then type in the mark.
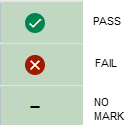
If the assessment is pass of fail. Select the box to scroll through the options:
When you have entered all of the marks select the Save Updated Assessments button, at the top of the mark book. The button will keep track of how many records you have updated.

If you leave the page without saving, your progress will be lost.
Fill column
If you need to enter the same mark for many learners you can quickly fill them in all at the same time.
Once you have filled in a mark for a learner, you can fill in the same mark for all learners for the same assessment. Using the Fill Column button, the mark you have entered will also be entered into all empty cells above and below the one you completed. Cells that already contain marks will be untouched.
Keeping track of changes
To make it easier to see what you’ve done since your last save, any cells that have been changed will be highlighted in green. Once you have saved the changes the highlight is removed.
Sort and filter markbook
The mark book can be sorted or filtered based on the contents of any of the columns.
Sort
To sort any column, select on the column title. This takes you through the three sort options:
-
Ascending
-
Descending
-
No Sort
The presence of an arrow in the column heading shows if the column is currently sorted and in which way.
Filter
To apply a filter to a column, hover over the column title, to see the menu button. Selecting this button opens the filter menu.
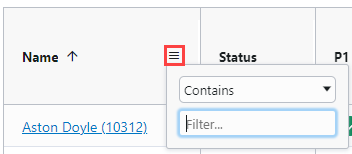
Use the dropdown to choose the logic for your filter.
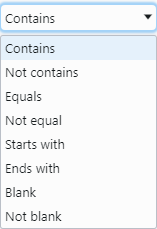
Then, if needed enter a value in the text box.
You can combine up to two logical statements in one column to narrow the results, using AND, or OR logic. For example, the filter below will only show learners who have a mark recorded, that is not equal to 50.
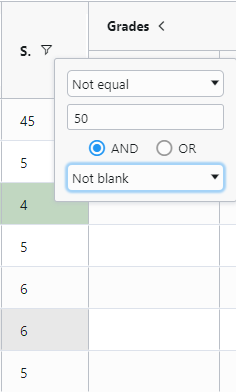
You can apply filters to as many columns as you need.
To clear your filters, select Clear all filters at the top of the markbook.
